The main purpose of your ‘Minimum Viable Product’ is to quickly see the essence of your idea in action and test your key hypothesis to minimize errors with the minimum amount of effort and resources. Some of the main benefits resulting from building an ‘MVP’ for your idea are:
- Initial model. Building your ‘MVP’ will make you focus on building the core – i.e. only one idea, not including multiple functionalities – and test who is the right audience and how much value is your core creating with minimal risk. This will give your team a starting point for discussions and offers clear visual points of reference.
- Idea approval. The ‘MVP’ offers an early and easy testing opportunity for you to swiftly collect user intelligence and feedback, understand issues you may face and improve towards how users would like to see your final product.
- Prepare implementation. It takes time to consolidate an idea, but to move on to bringing that idea to life is a completely new level. The ‘MVP’ prepares you for making that jump by offering the opportunity for market validation. You can present your brand to users and show what is your unique value proposition that sets your idea apart from your competitors.
Ready to build your ‘Minimum Viable Product’? Follow this simple 6-step process.
Six steps to build your Minimum Viable Product
Step 1 – Market research
Review your market research results and be sure to keep in mind your key conclusions about your target users’ needs and expectations, as well as on what competitors are offering and what your unique value proposition is.
Step 2 – Value proposition configuration
Express your idea in terms of the value you are creating for your target user:
- What unique value does your product offer (functional/emotional/social)?
- How does your product benefit users more than the current status quo?
- Why should anyone want your product more than they want their money?
Step 3 – User flow
Get into your target user’s skin and design your MVP in the most user-friendly way. Designing your ‘User Flow’ is about focusing on the main key tasks your user will go through when using your idea. Furthermore, it is about detailing how you will ensure the user successfully completes each task in the best possible way. From the moment the user first hears about your idea, until the moment the user is fully satisfied and surprised with it and chooses to become an active ambassador, you will only focus on explaining the process for each task. Some of the main tasks commonly considered include:
- Knowing about the product
- Finding and purchasing the product
- Setting-up the product for testing
- Using the product (repetitively)
Once the processes that guarantee the user will successfully complete each key task are defined, you may move onto defining the features of each stage.
Step 4 – Project features
Before starting to build your ‘MVP’, reflect on all the features you would like to incorporate into your product and ask yourself ‘What do users want? How can this be something beneficial?’ to prioritize these features as either high, medium or low priority. Once you have organized your list of features, you should define their scope for the first version of the product and sequentially define how features will evolve and be added as your idea evolves.
Step 5 – Prototype
Building on the previous 4 steps, you are now ready to develop your ‘MVP’! It is important to remember that your ‘MVP’ should not deliver lower quality than your final product. This should still fully address your target users’ needs and wants, only in a simpler way, making use of minimum efforts and resources.
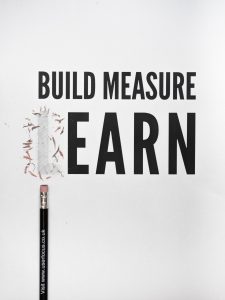
Step 6 – Build, measure and learn
After launching your ‘MVP’ it is crucial to collect user intelligence and feedback, especially with regard to where your idea is underperforming and where it is offering something that is not valued. This is what will help you understand if your idea fits the market, how it is performing against current competition, and what untapped opportunities you could still explore.
Some famous MVP examples
- Explainer video, creating a video showing a working prototype or just illustrating how a product, service or process will bring unique value for a target user (e.g. Dropbox);
- Landing page, creating a website explaining what your product is, how it would work and encouraging people to sign up or click if interested in knowing more (e.g. Buffer);
- Wizard of Oz, testing a product, service or process using a ‘man-behind-the-curtain’ approach, where target users interact with a landing page, but the actual functions that deliver the promised value are executed by you (e.g. Zappos);
- Concierge, testing a product, service or process where you appear as a ‘concierge’ ensuring the execution of all the necessary functions to deliver the promised value to the target customer, thus exploring your assumptions (e.g. Airbnb);
- Single-featured prototype, following an agile and iterative product cycle of ‘Think it, Build it, Ship it, Tweak it’ where you focus on one feature and gradually release the MVP while gathering user intelligence and iterate as necessary (e.g. Spotify).
This is a never-ending process, so remember that after launching your first ‘MVP’ and gathering user feedback you should record your key learnings, identify new hypotheses to test, work on improving your first ‘MVP’ and launch a second ‘MVP’, thus repeating the process.
Excited to translate your business idea into a scalable business model?
Simply sign up now to access our tutorials, videos and tools that guide you through the art of creating and testing winning business models.
All this, and a lot more – for free!
